A friend asked me to make a quilt for her. She had a photograph that she wanted to include in the quilt, but beyond that, she had no idea what she wanted.
I drafted a plan using graph paper and crayons. Yes, my tools were old-fashioned but the result was a modern-looking quilt. Once I had the plan drawn, I submitted the photo to Spoonflower and had them print it on a fat quarter sized piece of cotton fabric.
While I was piecing the quilt, I kept thinking about an article from Machine Quilting Unlimited where Bethanne Nemesh discussed a process she calls mid-custom quilting. In this style of quilting, a simple design that is quick to quilt is paired with another motif that looks much more custom. I searched and searched for that issue of the magazine and could not seem to find it.
One morning, while I was working on the quilt, I got the idea to order a second subscription to the magazine–a digital subscription this time. I thought that way I wouldn’t lose the magazine or forget where I saw a particular design. However, before I had a chance to take action on that wonderful plan…I found the issue. When I saw the article again, I was amazed at how well-suited the quilting idea was for my quilt.
Trying to save time, I decided to mark the quilt on the frame. I thought I was being really smart, and things moved along quickly. I marked the border feathers using a stencil and pounce powder, and I marked the vertical and horizontal lines with a disappearing purple marker.
As I approached the bottom of the quilt, I began to consider how to remove the pounce marks. Typically, they remove with a hot iron. Uh oh! I then remembered that the disappearing ink pen sets permanently if heat is applied. So the only way to safely remove both marks was to soak/wash the quilt. And that’s what I did, and the marks all washed away. But the lesson I learned is to consider carefully before using multiple marking methods on the same quilt.
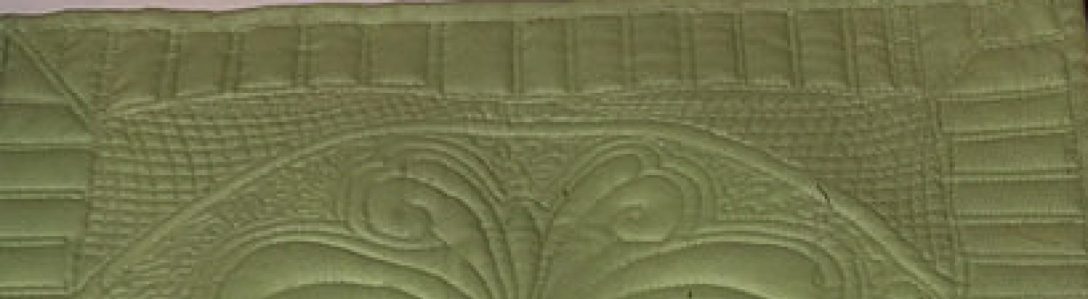
Here are some photos of the quilt and close-ups of the quilting. I modified the photo to protect my friend’s privacy.


Wonderful quilt. I haven’t marked a quilt for this exact fear….thay it won’t come out! Enjoyed your post
LikeLike
I have tried a number of different ways to mark–the blue pens, the purple pens, Crayola washable markers, chalk, tailor’s chalk, pounce, etc. Currrently my favorite is the disappearing purple pen. I like to mark just the row or block I am working on. If I mess up the marking, I can just skip that area and come back to it later to try again.
I did an experiment with the “Blue Line Remover” product. I tested it with the blue marker and the pink marker that they sell. It removed both. I then tested by ironing over the marks. It did not completely remove the marks after I ironed over them. Then I soaked the fabric in water and let it dry, The original marks never came back but the ones I ironed over had a fine brown line. However, it is now several weeks later and when I picked up that piece of fabric again to inspect it, I can no longer see the line.
LikeLike
Does pens leave a residue? I may check out a few marking pens!
LikeLike
I have not found the purple disappearing markers to leave a residue. I have not seen that faint white line that you sometimes see when you use a Frixion pen. I do like to wash my quilts before giving them away and I try not to iron over where the pen was…just in case. My biggest problem with the disappearing purple pens is keeping them in my sewing room–my husband likes to use them too, for marking spots on the wall before he drills!
LikeLike